Desktop Table
The transactions table allows you to view and edit transactions quickly. Here are some tips.
Grouping
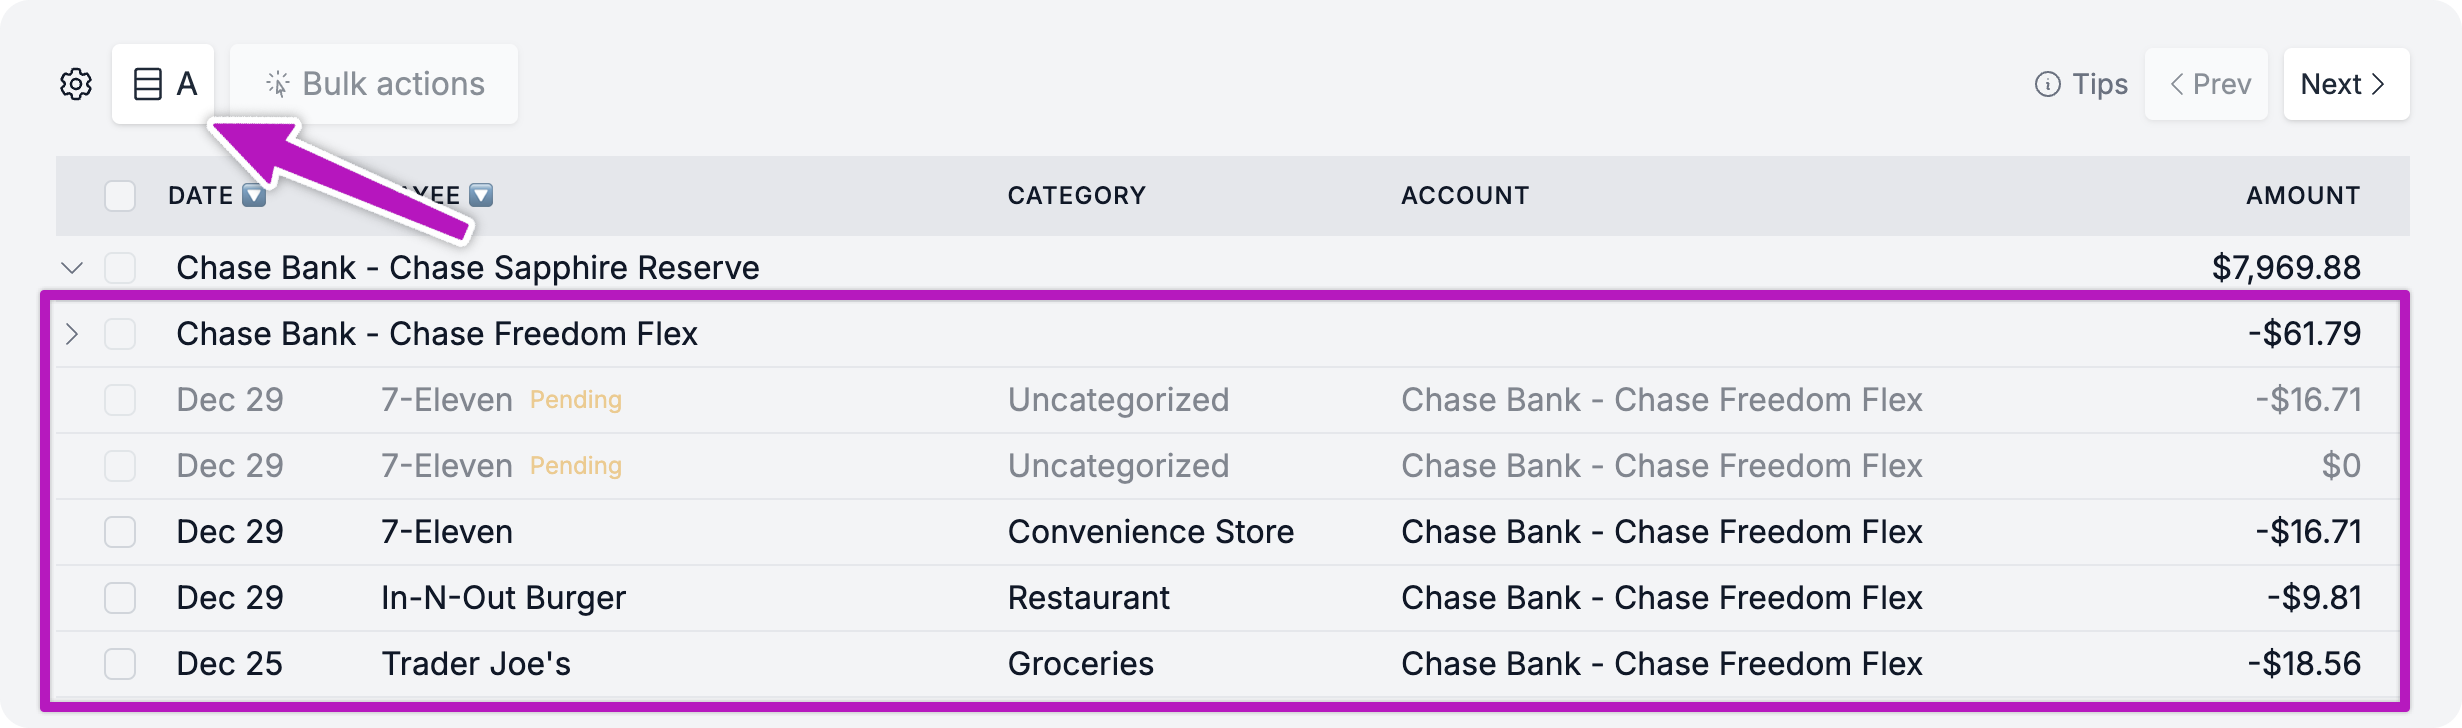
Use the pivot button to group your transactions. Clicking the button multiple times will toggle between the following views:
- Day
- Category
- Account
Customize Columns
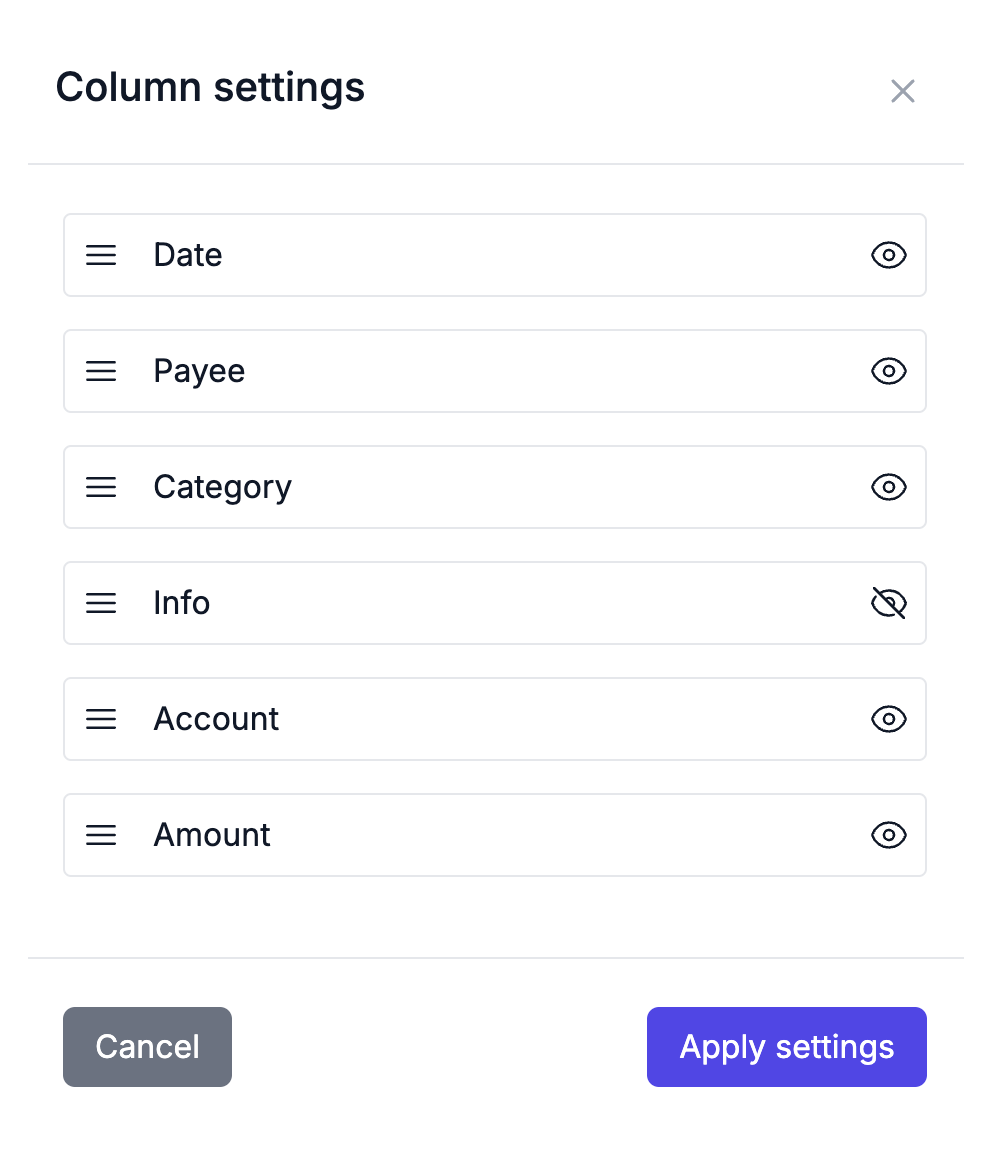
Reorder or hide columns to fit your needs. You can also resize columns by hovering over the header.
Multi-Sort

You can apply a secondary sort to your transactions. First, click on a column header to sort by that column. Then, hold down the Shift key and click on another column header to apply a secondary sort.
Select Range
You can select a range of transactions by clicking a checkbox in the first column, holding down the Shift key, and clicking another checkbox. This also works for deselecting a range.
Bulk Updates
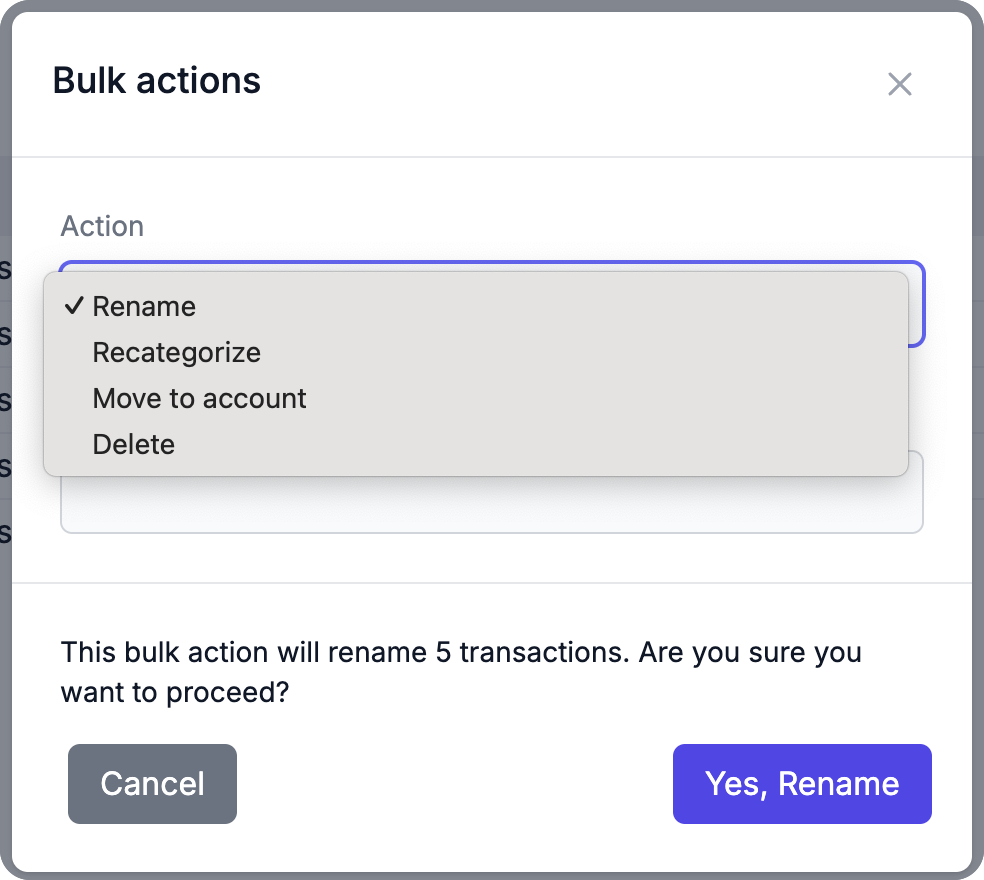
You can update multiple transactions at once with bulk actions. First, search for the transactions you want to update or apply filters to narrow your search. Then, use the bulk actions button to update multiple transactions at once.
This can be used to clean up identifying store numbers (Walmart #1234 -> Walmart), recategorizing, moving accounts, or deleting in bulk.
Info Icons

Info icons tell you more about a transaction.
![]() : memo / comments
: memo / comments
![]() : attachments
: attachments
![]() : has/requires currency conversion
: has/requires currency conversion
![]() : multiple lines (often when you scan receipts)
: multiple lines (often when you scan receipts)
Shortcuts
Date Filter Shortcuts
D- TodayM- This MonthY- This Year<orLeft- Previous period>orRight- Next period
Transaction Table Shortcuts
N- New/- SearchF- FiltersQ- Quick tag (See tags)
With Checked Items
C- Categorize CheckedBackspace- Delete Checked
In Edit Mode
Ctrl/Cmd + EnterSave